
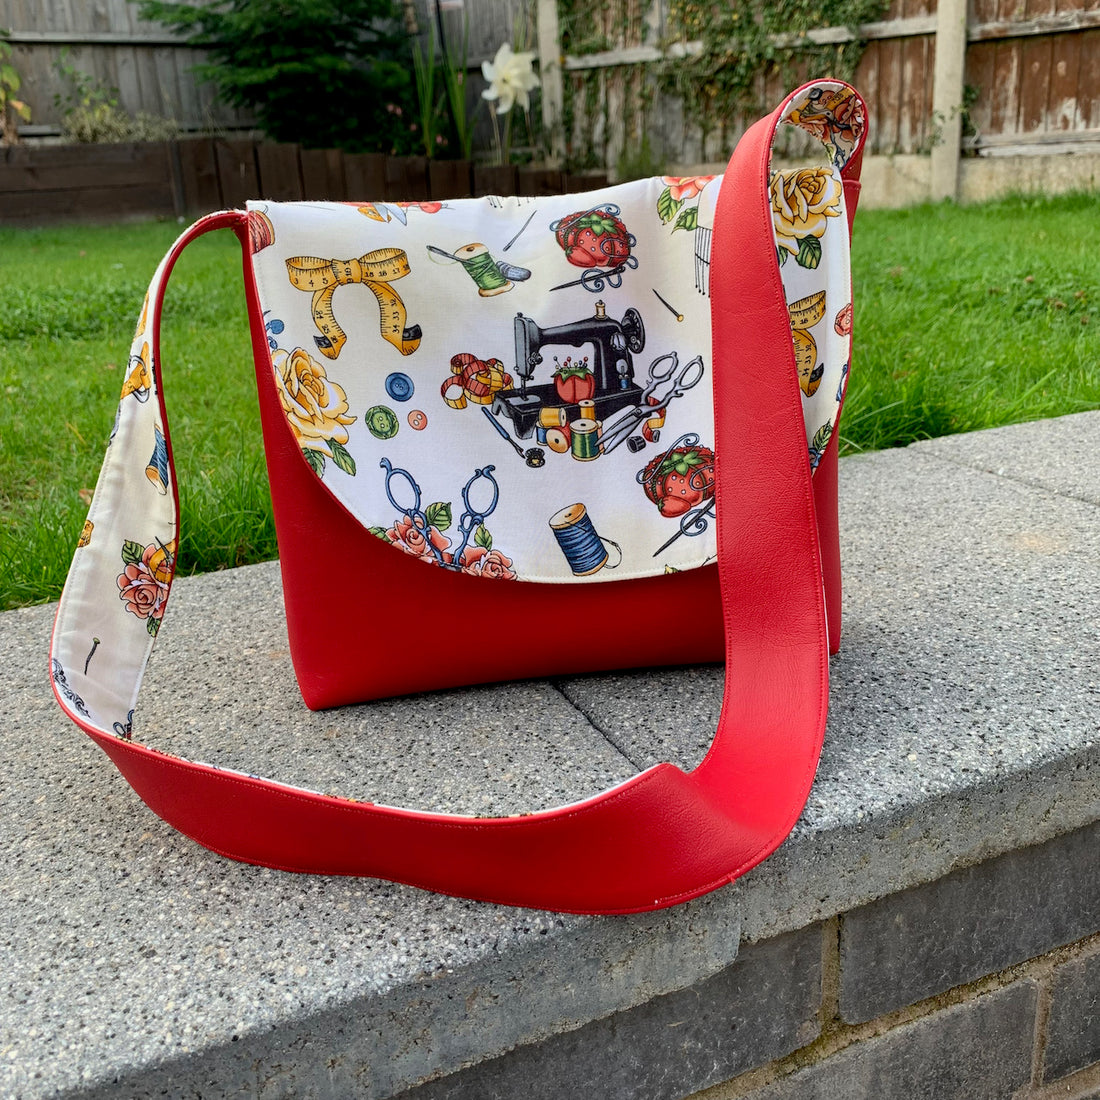

The LeatheretteLux is a fabulous material that, among other things, would make a fabulous bag. This pattern is a great introduction to bag making. It’s a good idea to read through before starting.
You will Need:

2 continuous pieces of our LeatheretteLux (Add two mini rolls to your shopping basket - it will be cut continuous enabling the piece to be wide enough for the pattern)
1 ‘D’ ring (optional)
Half a metre of cotton fabric for the bag lining.
Co-ordinating thread.
Basic sewing skills
A fabric marker is handy to have, as is quilting clips.
Pattern pieces – click here. A 1cm seam allowance is used throughout unless stated. You will need to cut out and join the pattern pieces together at the centerline for both the bag and the bag flap.
Instructions
Using the pattern pieces you will need to cut two bag pieces each in the Leatherette and two again in your lining fabric. You will also need to do 1 of each for the bag flap. Keep the pattern pieces on the LeatheretteLux aligned to the top of the fabric – you will need the bottom piece later

Once you have done this and before you go any further add your magnetic clasps. These are simple to add but will give your finished bag a more polished look. You will be adding one side to one of the leatherette bag side and the leatherette side of the flap. Using the trianglar marks on your pattern add this mark to the back of the two leatherette pieces.


I fold the pattern at this point to accurately add the markings. Using the prongs push hard on the LeatheretteLux material on your mark will leave two tiny dents.


Carefully use a seam ripper to carefully make two tiny slits on these dents to push the magnetic clasp through from the FRONT. Once through push the metal back over the pins and bend the pins back over each other to secure. Easy – now add the other side to the bag flap again having the pins pushing through to the back of the leatherette.
Now place your two bag flap pieces good sides together.

Top Top
As the Leatherette is quite thick quilters clips are really handy here if you have them.
Sew round the edge (except the straight top edge). Turn. You can press the seam but use a pressing cloth and do it on the fabric side. Top stitching* this will give it a nice crisp finish. Its also worth running a line of stitches INSIDE the seam allowance at the top of the flap. This keeps the two layers together when sewing to the bag.

*Topstitching is an extra line of stitching sewn on the right side of the fabric that is parallel to the edge of your project, it gives a decorative yet sharp finish for a more professional look.
If you are planning on adding an inside pocket just to drop your phone into now is the time to do so. This is optional and depending on the size of your phone you might need a little bit more fabric. I like adding a patch pocket to my bags to put my phone in so i confined it and stop the screen getting scratched. Using measurements that were 2 cm bigger on each side than my phone I cut two rectangles out of my lining fabric. Stitch round using a 1 cm seam allowance, leaving a turning gap at the bottom. Clip the corners, turn and press. Place in the center of your lining fabric 3cm down from the top. Pin in position and top stich round the sides and bottom creating your pocket. Easy way to center – fold both your pocket and lining fabric in half Pair up the center fold creases.

Just a thought!
While you are pocket making why not add a fabric loop with a D ring to the seam of your bag. Its great for clipping a trolly coin/car keys/hand sanitizer to your bag so you can find them quickly! You need a piece of fabric 8cm x 8cm. Fold in half with the wrong sides together, press. Fold the edges under by 1.5 cm, press and topstitch. Add ‘D ’ring and sew 4cm down from the top of one of your lining pieces ensuring you use a 0.5cm seam allowance and have 1cm sticking over the edge of the lining. Follow on to the next steps.


So you now need to attach the flap to the bag. Place the flap (Leatherette side up – fabric side down) in the center of the main bag Leatherette (the one WITHOUT the clasp) and sew along the top – use half the seam allowance so these stitches wont be seen on the finished bag (0.05 cm). Again quilters clips come in handy. Now place the other bag side over the top – good sides together. Sew each side and the bottom.

Now place the other bag side over the top – good sides together. Sew each side and the bottom.
Now take the lining and place good sides together and sew down both sides of the lining sides (reversing over the ‘d’ ring tab for added strength). Only sew 5 cm from each side of the bottom leaving a generous gap in the middle – you will need this later!
Making the box corner on you bag is much easier than it looks. Making sure you seams overlap when pushed flat sew across the ends of the fabric. Do this for the other corners. Turn the leatherette the right way – doesn’t it look fab? Sew the box corners to the lining in the same way but leave it insideout though.


Now we are looking at the strap. A finished width of 4cm looks great on this bag. You can take a 10cm strip from across the bottom of your fabric (full width), fold the fabric in half along the length and using a 1cm seam sew, turn and press. Topstitching this is optional. You can decide on the length you want your strap (this is very individual) and cut to size.

Want to make you bag look even better? – use the leatherette on one side.

You will want to cut a 6cm wide strip from both your cotton fabric and the leatherette. Place good sides together (again quilters clips are useful) and sew down one side.

Using a pressing cloth press this opened out the right way. Topstitching will really help this look crisp so don't skip this step. On the other side of the strap press your cotton fabric under by 1cm. Using a pressing cloth do this to the leatherette side.

Tip to make this much easier – take your ruler and position 1cm in and score down the edge of the ruler with your seam ripper. Use a pressing cloth and press the LeatheretteLux over before you start sewing.


Keeping both seam allowances tucked inside, slowly feed this under your machine top stitching all the way down, keep checking its in line.It should look like your other side when finished. This way does take longer, is more fiddly and may involve some cussing but your efforts will be rewarded because it looks amazing.


Sew the strap onto the side of the bag using a 0.05cm seam allowance. (If you made one side leatherette the have that facing the leatherette bag). You will want to position the strap over the centre of the bags side seam. Do check the strap isn’t twisted before you sew up the other side – not that I’ve done that before :-) its also worth checking once you have sewn one side that you are happy with the strap length.

Almost done. Slide your outer bag into the lining. It will be snug but you can poke the straps out of the turning hole. If you have added a patch pocked and want it at the back of the bag make sure it’s against the side with the flap. Line up your side seams.


Stitch all the way round the top of the bag – you can reinforce the straps by reversing over them if you feel you need to. Don’t forget it’s a 1cm seam again and this will hide all the other stitches
You now need to turn your bag the right way by pulling your cotton liner over the bag to pull it through. Now is the time your large turning gap is appreciated! You can either hand or machine sew your turning gap closed. Hand sewing using a ladder stich will leave it invisible.


Press the top of your bag into place. Don’t forget your pressing cloth on the leatherette. Final task is top stitching round the top of the bagwill finish the edge nice and crisp. Make sure you are not catching the bag flap or strap as you do this.


All that’s left is to stand back and admire your work, well done!


Please show us your makes in our Creative Craft Supplies Group - we would love to see them!
Please feel free to use this bag pattern as a small crafter, to make to sell on a small scale. Please do not share the pattern – direct them to our website instead. Thank you.